
It was meant to be easy. Dinner for six, just one gadget to use, and hardly any cleanup afterward. The
recipe promised “20 minutes, hands-off.” Sounds perfect, right? But then, halfway through the cooking
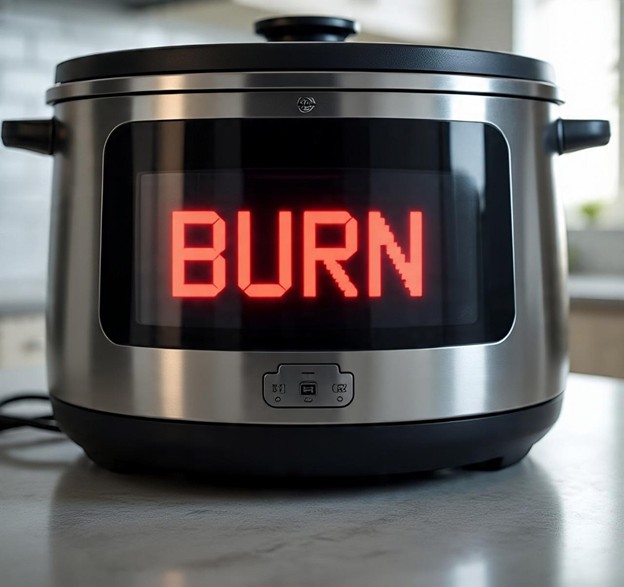
cycle, my $120 miracle machine started beeping, flashing, and then just froze up with a message:
“FOOD BURN.”
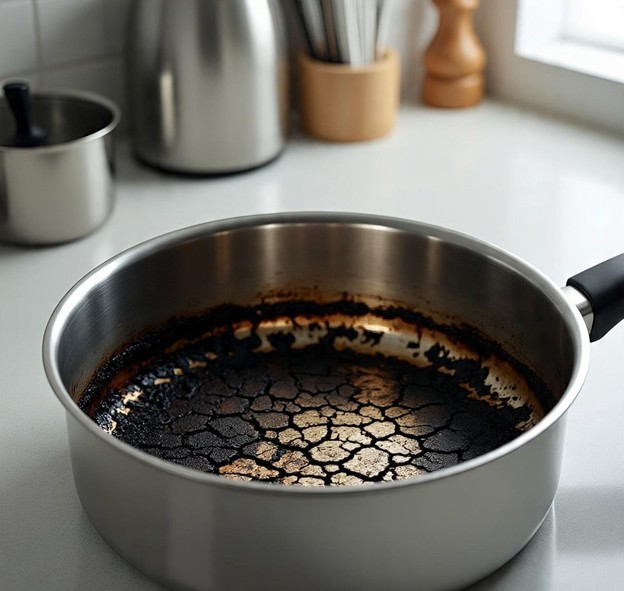
At first, I was in full-on panic mode. I was pressing buttons like a mad scientist in a lab gone wrong. I opened the lid way too early and got hit with a blast of hot steam. I found myself scraping off a layer of burnt rice from the bottom like some kind of kitchen archaeologist. In the end, I just gave in and ordered pizza—again.
The worst part? This wasn’t my first culinary disaster. Each failed attempt chipped away at my confidence. Was I really this terrible at cooking, or was there something else going on?
Here’s the truth: that BURN message isn’t a personal attack on your cooking skills. It’s just feedback. Once I figured out how to interpret it, I finally stopped wasting my weeknights—and my patience—on this machine.
Here’s everything I wish I had known from the start.
Why “BURN” isn’t a glitch — it’s your cooker talking back
The “BURN” message isn’t just a random alert; it’s actually your cooker’s built-in safety feature. When the sensors notice that the base is heating up too quickly without enough steam to keep things in check, the display lights up with that warning. It’s like your cooker is saying, “Hey, I’m getting too hot! Something’s not right here.”
Here are some common culprits that can trigger this warning:
- Thick sauces or heavy ingredients that settle at the bottom, like chili, tomato paste, or curry.
- Not enough thin liquid, such as water, broth, or stock. If there’s not enough, steam can’t build up properly.
- Any debris or residue on the heating plate that stops it from making even contact.
- Starchy foods like pasta, beans, or rice that can stick, scorch, and create a burnt layer.
Pro Tips:
- Always use at least 1 to 1.5 cups of thin liquid unless your recipe says otherwise.
- Hold off on adding flour, cornstarch, or heavy cream until after pressure cooking—save them for the sauté phase or add them at the end.
If you hear a faint sizzling sound before the timer even starts, stop what you’re doing and give it a stir—that’s your cooker trying to warn you!
Just a quick reminder: not all appliances are created equal when it comes to handling stress. If you’re looking for some guidance on picking safe and durable appliances, check out KitchenSupports’ insightful article on Are Air Fryers Toxic? It really explores the quality of.
Simple tricks that prevent BURN before it starts
Prevention is key! These simple tweaks can help you avoid that annoying beep in the future:
- Always kick things off with liquid. Make it a habit: pour in water, stock, or a light broth before adding anything else.
- Layer your ingredients smartly. Put vegetables or grains in the center, proteins on top, and save those heavy sauces for later.
- Don’t skip the deglazing step. After you sauté onions, garlic, or meat, add a splash of liquid and scrape up all those tasty browned bits. Even one little piece stuck can set off the sensor.
- Be cautious with recipes. Some creators assume their pot works just like yours. If it says “1 cup water,” don’t hesitate to bump it up to 1.25 cups if needed.
Pro Tips:
- Always follow the “sauté → cancel → pressure cook” routine. It helps get rid of excess heat before sealing.
- Keep a wooden spoon handy—it’s perfect for scraping and won’t harm the pot’s lining.
If your dish tends to get thick, give it a stir halfway through the cooking cycle (pause, stir, then resume).
If you’re looking for a little extra reassurance. I came across this super helpful Business Insider guide on the BURN message. It walks you through troubleshooting for every model, step by step!
How to set up a foolproof cooking workflow
Think of this as your go-to Instant Pot checklist. Before you dive into adding your ingredients, make sure to:
- Check the inner pot base. Give it a good wipe to ensure it’s dry and free of any rice grains or crumbs lurking underneath.
- Inspect the sealing ring. If it’s cracked, loose, or stretched out, it won’t hold steam properly.
- Confirm you have enough thin liquid. A good rule of thumb is to use at least 1 to 1.5 cups for most recipes.
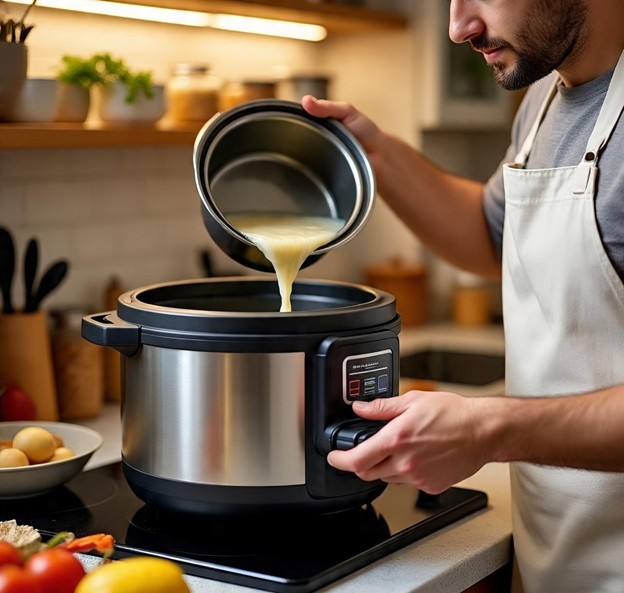
- Use pot-in-pot (PIP). For thick sauces or casseroles, place them in a smaller oven-safe dish inside the main pot, with water underneath.
Pro Tips:
- Swap out sealing rings every 12 to 18 months. It’s handy to have one for savory dishes and another for sweet ones.
- Try out new recipes on the weekend when you have more time—not during those hectic weeknights.
- Keep a whiteboard or sticky note on the fridge with your “safe liquid ratios” for a quick reference.
Gear, layout & accessories that make a difference
You might not realize how much your kitchen setup can impact your pressure cooker experience. But trust me, these little upgrades made a world of difference for me:
- Trivet or steam rack→ keeps your food elevated and away from direct heat.
- Second inner pot → allows you to sauté in one while cooking in the other, preventing any buildup.
- Non-stick or ceramic insert → helps avoid scorching, especially for those sticky recipes.
- Instant-read thermometer → say goodbye to the guesswork when checking if the chicken is cooked through.
- Flat countertop space→ make sure to place your cooker on even surfaces, steering clear of metal ones like stovetops that can mess with heat distribution.
Pro Tips:
- Keep your Instant Pot away from the stove burners to prevent any accidental heat damage.
- Consider getting a heat-proof mat if you have granite or wooden countertops.
- A glass lid accessory can be a game-changer—perfect for slow cooking or keeping your food warm without pressure.
Debugging when nothing works
Sometimes, even when you think you’ve done everything right, that pesky BURN message can still pop up. That’s your cue to start troubleshooting:
- Run a water test. Just fill the cooker with water and see what happens. If it still burns, don’t blame yourself—it’s likely a hardware issue.
- Inspect the sealing ring. These rings tend to wear out every 12 to 18 months, so it’s a good idea to keep a spare on hand.
- Check for mineral buildup. If you have hard water, it might be coating the heating plate. A little vinegar and a cloth can do wonders to clean it up.
- Consider updating your model. Some older models have sensors that are a bit too sensitive. Manufacturers often provide fixes or replacements for these issues.
Pro Tips:
- If your pot keeps flashing “BURN,” take a look at forums for model-specific quirks—some models are notorious for being overly sensitive.
- Make it a habit to descale monthly with a mix of 1 cup vinegar and 2 cups water on the “steam” setting.
- Keep customer support numbers close—sometimes those stubborn BURN errors can be resolved under warranty.
Recipes that are most likely to trigger BURN (and how to fix them)
Some dishes are practically made to test your patience in the kitchen. Here’s how to tackle them like a pro:
- Tomato-based sauces→ add the tomatoes at the end, right on top, and give it a stir after pressure cooking.
- Chili and curry → try using the PIP method or thin it out with a bit more broth.
- Rice dishes → rinse the rice well to get rid of excess starch, then use a trivet or a separate insert for cooking.
- Oatmeal → cook it on low pressure and give it a stir afterward; otherwise, it can stick like crazy.
Pro Tips:
- For rice or grains, give the inner pot a light coating of oil before you start cooking.
- For chili, consider replacing half of the tomato paste with diced tomatoes and some broth.
- For oatmeal, opt for steel-cut oats—they tend to stick less than rolled oats.
The payoff: what changes when you master it
When you finally let go of the struggle with the BURN message, here’s what you can expect:
- Dinner becomes a breeze. Say goodbye to the frantic googling while you’re cooking.
- The food tastes amazing. No more bitter, burnt bits ruining your meal.
- You save some cash. No more tossing out ingredients or relying on last-minute pizza deliveries.
- Your confidence soars. You’ll no longer fear the very appliance that’s supposed to make your life easier.
Pro Tips:
- Create a “success recipe list”—these are the meals you know will turn out great. Rotate through them to build your confidence.
- Share your no-BURN cooking tips in groups—someone will definitely appreciate it.
- Treat yourself once you’ve mastered it: your newfound confidence deserves a little celebration!
Final Challenge
Tonight, put your newfound skills to the test! Try cooking something you’ve struggled with in the past—like chili, rice, or curry. Don’t forget to add that extra splash of broth, deglaze the pan, or use a trivet. When the timer goes off and you don’t see that dreaded BURN message, you’ll come to a realization: it wasn’t you all along; it was just the technique. And guess what? You’ve conquered the beep!

